MUX.Dialog plugin for beautiful dialogs in your project
 This plugin will allow you to easily and elegantly display messages and small forms in your web projects, built on Mootools.
Key features
-
the
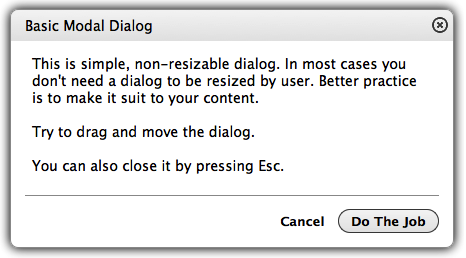
- Polnofunktsionalnyi dialogues. So out of the box working modality, windowing, closing on Esc, dragging, stretching (optional), a convenient mechanism for adding buttons and other Goodies. It is all very unobtrusive. the
- Simple API for customization and manipulation of the dialogs. the
- Styling via CSS, which means that many, if not all of the properties associated with the appearance and even some associated with the behavior, you can override in their CSS files, so you can easily write the dialogues in the style of your project (see examples). the
- Events allow you to intercept the key points of the behavior of dialogs and add their own behavior. the
- Works out of the box with the MUX.Loaders, but does not require them if you don't want to use them. Just plug the file leaderof before the dialogue and all the animation itself starts before the event
submitand stop when closing.
the - Full documentation and examples.
The project is on github https://github.com/lavmax/MUX.Dialog.
Tested on IE7+, FF3+, Chrome, Safari, Opera latest versions.
Some examples of usage and customization
Generate and output a very simple modal dialog with a message and click on the cross to close
the
new MUX.Dialog({
content: new Element('p', {html: 'Text message to the user. Hi.'})
});
Generate and output a typical modal message
the
new MUX.Dialog({
title: 'Attention!',
content: new Element('p', {html: 'Text message to the user. Hi.'}),
buttons: [{
title: 'I understand',
click: 'close'
}]
});
Working with events
the
new MUX.Dialog({
title: 'Attention!',
content: new Element('p', {html: 'Text message to the user. Hi.'}),
buttons: [{
title: 'I understand',
click: 'submit'
}],
onOpen: function()
{
// Manipulation of content when the dialog is opened.
// Content already loaded from the server
// and inserted in the document, but still invisible.
this.content.getElement('my-selector').doSomething();
},
onSubmit: function()
{
// This code will  work  when you press button 'I understand'.
var self = this;
new Request({
...,
onFailure: function(xhr)
{
...
self.loader.stop();
},
onSuccess: function(responseText, responseXML)
{
...
self.close();
}
}).post();
},
onClose: function()
{
// OnClose code will work whenever the dialog is closed,
// including clicking the x in the corner.
//  For  example, stop the animation
// (although actually it is, and so it stops when you close).
this.loader.stop();
}
});
Working with styles — change the mouse cursor. By default, the heading and in the corner of the drag-and-drop of courses has an arrow shape. For example, if you want to do and move the arrow to extend the window, add the following to your CSS styles.
the
.mux-dialog-header {
cursor: move;
}

.mux-dialog-resize-icon {
cursor: se-resize;
}
More examples of dialogue and working code.
a Description of all possible options, events and methods here.
I say, before writing this library, I got acquainted with all that lies on Forge Mootools, Mocha UI, ExtJS and jQueryUI. However, I will refrain from describing, what I did not come each of these libraries, so as not to raise unnecessary dispute. Everyone decides for himself.
Count very much on constructive criticism in comments on all aspects (appearance, use, code). If you use this library in real projects please give me know in PM or on github so I can post links to your projects on github.


Комментарии
Отправить комментарий